Cutout Effect! Photoshop Tutorial
- Oct 14, 2018
- 3 min read
Beginners guide

In this Photoshop Elements tutorial I will show you how to use the Cutout effect. This is the effect I've used in my Sites of the UK project to give them a child like, innocent effect.
Choosing an Image
This effect works best with high contrast, landscape images - though it is absolutely worth experimenting. If you're not sure which picture to use just experiment adding the effect to most (if not all) of them! The tool is simple enough that some trial and error won't be a problem at all

For this tutorial I'll be editing a photo of Southstack Lighthouse. This is a good image to use as I haven't sharpened it perfectly - however that doesn't matter for the Cutout effect as most of the sharpness will be lost anyway, so it's a good way of using an otherwise unusable image.
Locate the Cutout Effect in the Filter Gallery
After opening your chosen image in Photoshop, locate the Filter Gallery.
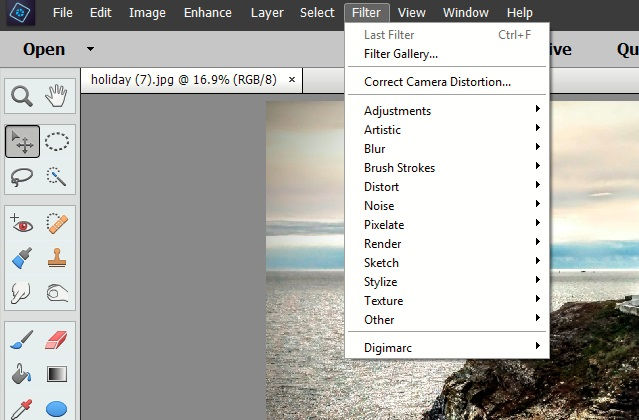
The filter gallery is under the Filter tab.

A window will open in Photoshop with an image preview of the chosen effect left and the tool options right.
The Cutout effect is under the Artistic tab. Select it to apply the effect.
Play Around

There will be three sliders to play with each changing a characteristic of the effect.

The number of levels will make more colours and tones appear in the effect. Edge simplicity affects how simple or complex the lines are. Fidelity will change how smooth the effect looks. Play around and see what works! There are many different results you could achieve from the Cutout effect.
All Happy?
Once you have your desired effect, click "OK" and the effect will be applied.

If you are working with multiple layers (see the amount of layers in the image right) make sure you flatten the image before saving it as a JPEG. Flatten an image by right clicking any layer (ctrl+ click on Mac) and selecting Flatten Image.
You can then save the final image.
~~Liam J. Turner
Side Note: You may find your picture isn't optimal for a Cutout effect. This could be the case if your picture has a lot of very dark or very bright detail or if colours in one section of the image are leaking into another (for example, in reflections).
This won't necessarily ruin the effect, but if you're unhappy you can always make some adjustments to your photo then apply the Cutout effect afterwards.

One of the easiest ways to adjust your image is with an Adjustment Layer, found under the Layer tab. The ones that may prove most helpful to you are the: Levels, Brightness/Contrast and Hue/Saturation layers.
Don't be intimidated by using them, they work with simple sliders just like the Cutout effect.
Note that if you have an adjustment layer as well as the original image, the Cutout effect will be applied to the original photo without the adjustments. Be sure to merge the adjustment layer with the picture layer by right clicking them both and selecting "Merge Layers" or by flattening the image. Whenever you make adjustments to a layer, it is good practice to make a copy of that layer in case of mistakes. Any layer can be duplicated by right clicking it and choosing "Duplicate Layer".


Comments